La Crosse Public Library Mail Merge page 1
How to Use Mail Merge to Create Mailing Labels in Word
From: https://support.microsoft.com/en-us/kb/294684 (edited for clarity)
This article describes how to use the Mail Merge feature in Microsoft Word to create labels. A mail merge
involves merging a main document with a data source.
A main document contains the text and other items that remain the same in each label. A data source
contains the information that changes in each label, such as the name and address of each recipient.
Merge fields that you insert into the main document instruct Word where to print information from the
data source. When you perform the mail merge, Word replaces merge fields in the main document with
information from the data source. Each row (or record) in the data source produces an individual label.
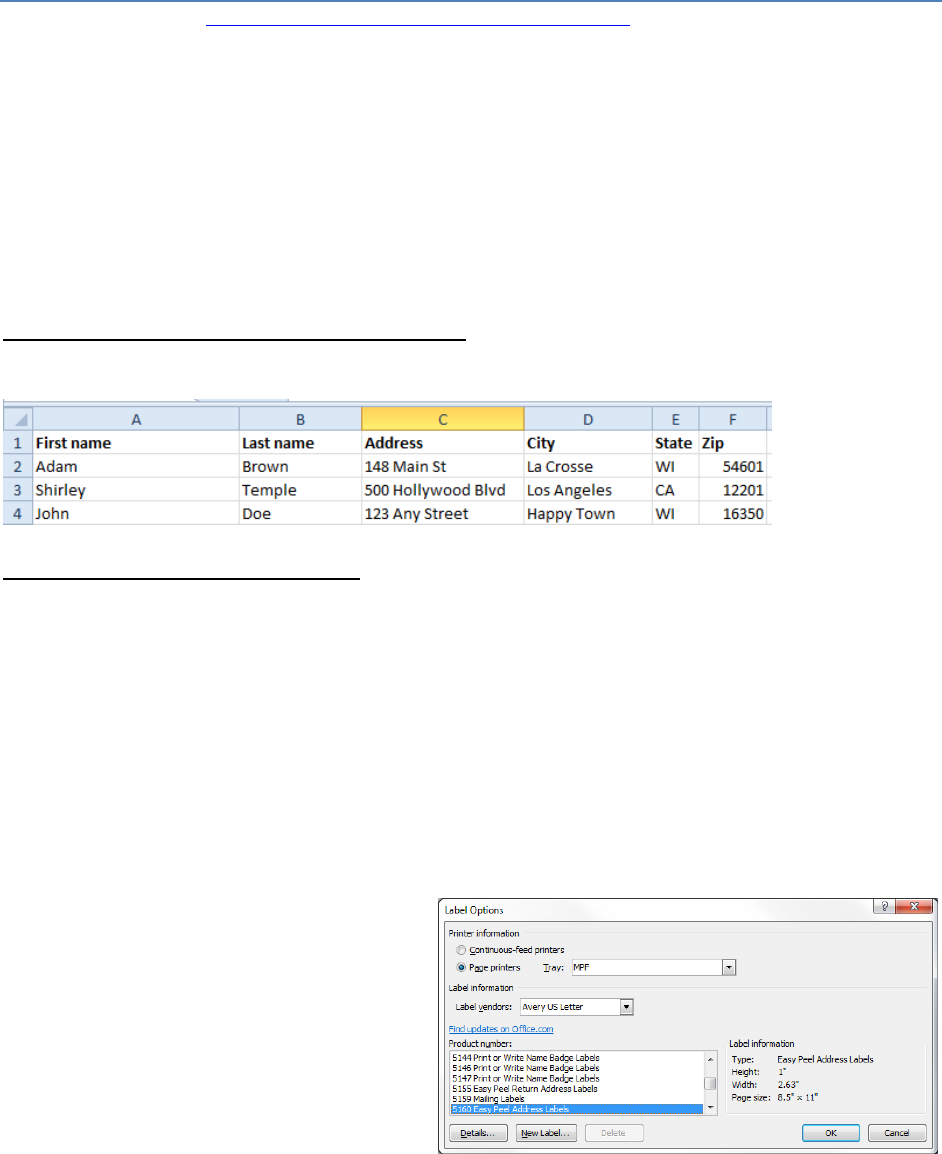
Create an address book spreadsheet in Excel. This is your data source. It is helpful to have
information in separate columns to easily sort, filter, etc.
Create the mailing label document
Start a new document to create new labels, or open an existing document that you used
previously to merge labels.
Microsoft Office Word 2007 or later versions of Word
On the Mailings tab, click Start Mail Merge, and then click Step by Step Mail Merge Wizard. This will
open a set of directions on the right side of the screen that we will be following.
1. Under Select document type, click Labels, and then click Next: Starting Document. (way at the
bottom right of the screen)
2. Under Select starting document, click Change document layout.
Click Label options. The Label
Options dialog box appears. Select
the type of printer (page printers),
the label vendor, and the product
number. If you are using a custom
label, click Details, and then type
the size of the label. Click OK after
completing.
Click Next: Select Recipients.
La Crosse Public Library Mail Merge page 2
Select a Data Source
3. Under Select recipients, click Use an existing list, and then click Browse under the Use
an existing list heading. The Select Data Source dialog box appears.
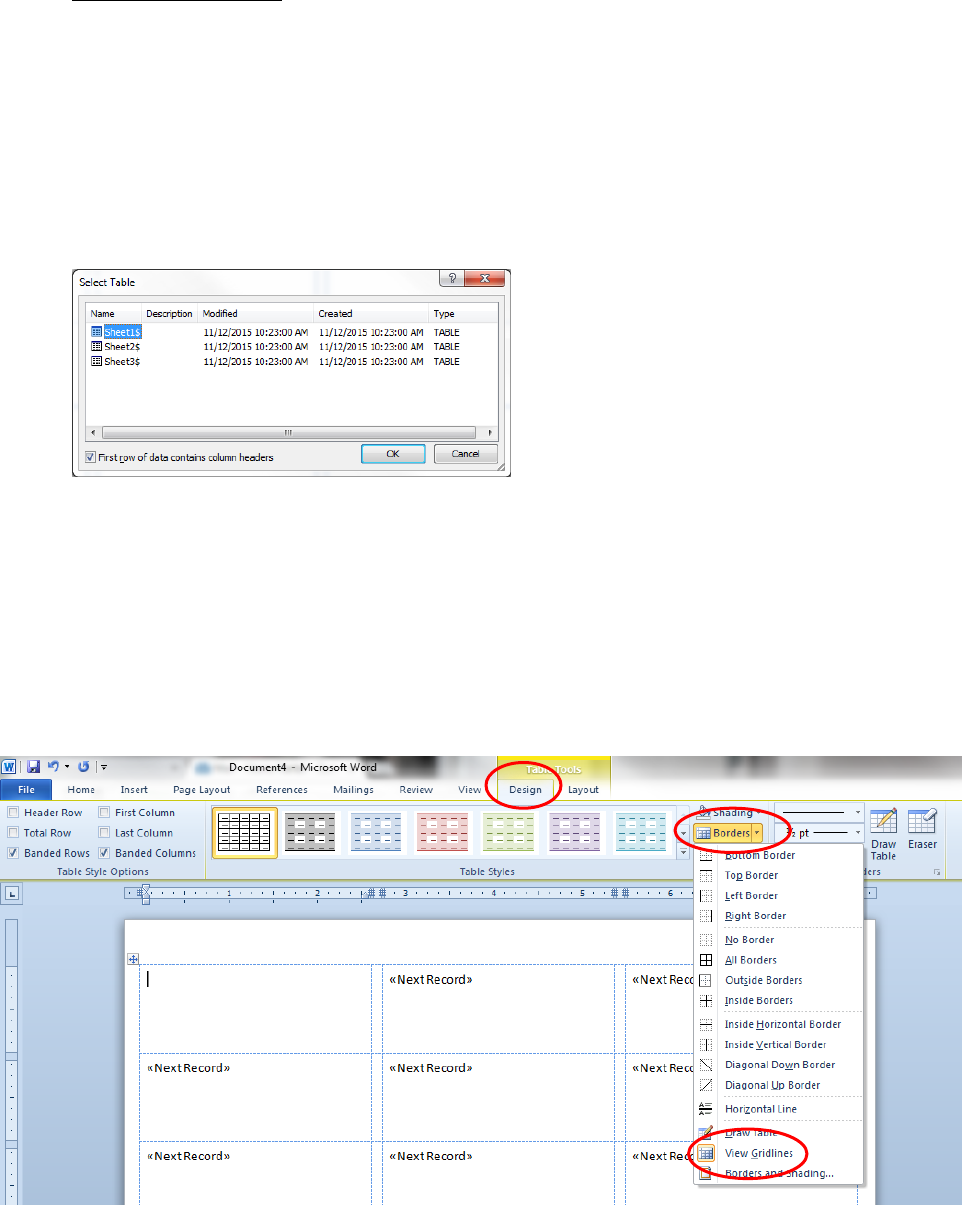
Click the appropriate drive and folder, select the file that you want to use, and then
click Open. Your data is probably in Sheet 1, so click OK. (If you renamed your sheet, it
would have that name instead of Sheet1$.) Also make sure to have the box checked if
your first row contains headers.
Word displays the Mail Merge Recipients dialog box for you to select specific
recipients. When you finish, click OK.
Your labels are displayed. You will see <<Next Record>>. This is good!
If you want to see grid lines, look for the yellow Table Tools ribbon, and click Design.
Then click Borders and then click View Gridlines near the bottom.
Click Next: Arrange your labels.
La Crosse Public Library Mail Merge page 3
Edit the label document
4. In the Mail Merge task pane, verify that the Arrange your labels step is displayed. In
this step, you can lay out your labels.
i. Word displays the items that you can use to lay out your labels, such as Address
block. After clicking in the first label where you want to insert, click to select an
item to display there.
Note: Use the More items options to add specific fields. This feature is useful if
there is some difficulty in laying out a data block, such as Address on the label.
The Insert Merge Field allows you to select a field in the block separately, such
as First Name, Address1 or City, so you can insert fields anywhere you like on the
label.
Note: Before clicking More items, click in the label where you want to insert the
merge fields that represent where Word will print the information from the data
source. Make sure that you type any spaces or punctuation that you want
between two merge fields or after a merge field, if needed.
ii. Verify desired label design is shown in the Preview window then click OK.
<<Address Block>> appears in your labels if you select Address block.
iii. When you finish setting up one label, click Update all labels to replicate all
labels.
iv. Click Next: Preview your labels to preview your merged data.
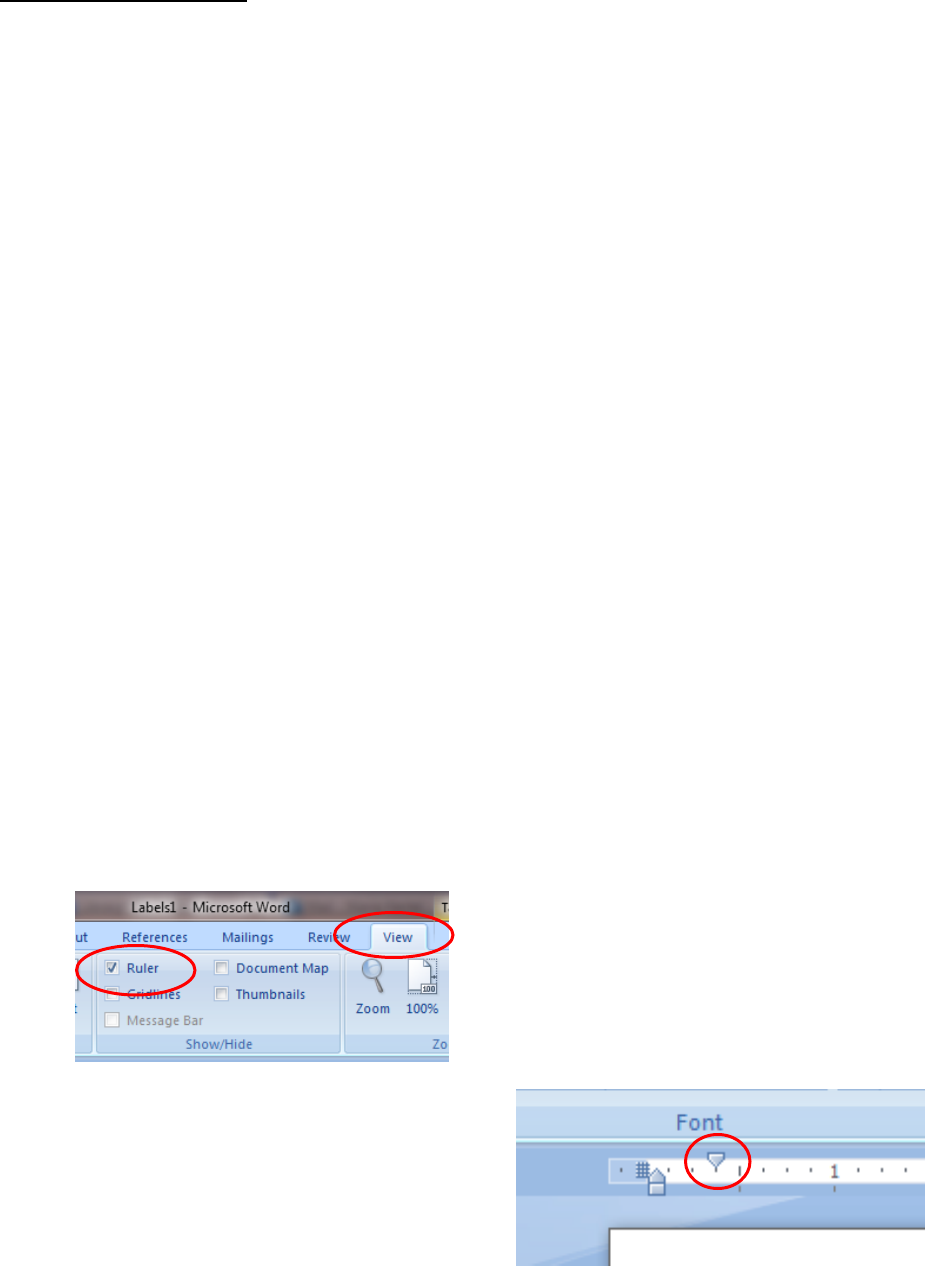
5. Take time to edit your document. You can change fonts, spacing, etc. I would advise
editing the label to add more space at the left edge of your text. To do this:
a. Make sure you can see the ruler. Go to the View ribbon, and check the Ruler box
b. Select All (CTRL+A)
c. Move the First line indent arrow to
the right.
La Crosse Public Library Mail Merge page 4
Save your document at this point. This will save a version with the general merged fields,
and will make it easier to update this document later. Maybe name it something like
“address label template” so you know it isn’t the finished product.
Tip In this saved version, you can click Preview Results (on the Mailings Ribbon) to
toggle back and forth to see the data fields.
Click Next: Complete the merge
Perform the merge
In the Mail Merge task pane, verify that the Complete the merge step is displayed.
6. To merge on the screen, click Edit individual labels. The Merge to new document dialog
box appears, so that you can select which records to merge. Select All and Click OK to
merge the labels. You can view the labels before you print them.
After the merged document appears on the screen, you can save it as a separate document.
Maybe call it something like “address labels final.” Note that in this saved version, you can’t
toggle back and forth between the Preview Results and data fields. You can edit further if you
want, but remember that you will be editing the final document, and not the label template.
Printing
1. Do a test print! This is a must, even if you think they will print fine. Print on regular
paper first, and hold it up to your labels to see if they will fit.
2. Insert the labels in your printer. Make sure you have the correct orientation (face up/face
down). Look for a picture on your printer.
3. Print the merged document by clicking File and then Print.
10/24/16
